Starter guide
This guide is designed for ease of use for first time players. Reading these isn't necessary to get into the game, but it's recommended, especially in case you're completely new to the game.
What is SS13 and Splurt?
Welcome to SPLURT station, a Space Station 13-based server for all of those wishing for a bit more spice to their Space Crew experience! SPLURT Station offers an 18+ roleplaying experience, both sexual or otherwise, in a welcoming community that will never judge you for a specific desire, or want! With Game Rounds lasting at least three hours, sometimes up to five hours, you are given the space and time to immerse yourself to the fullest! As SPLURT station is an MRP (Medium Role Play) server, while the station expects some level of professionalism, your creativity will not be hindered, or bogged down!
As well as the game server, SPLURT station also has an active Discord community, that will greet you with open arms! Should you have questions, or simply wish to interact with the community behind the scenes, that is the place to start! The Wiki itself will be a comprehensive guide, to combine the various in-game rules, and Server rules, as well as the various job guides, and occasional bits of lore, and the universe behind SPLURT station. However, don't be discouraged from trying your own thing, and creating characters separate from any potential background information offered!
So, what are you waiting for? Be it experienced, or new to the roleplaying scheme, SPLURT station welcomes any and all who would enter, so don't hesitate, and join our ever-expanding community!
Space Station 13 is a multiplayer sandbox that has a heavy focus on player interaction and roleplay. It features an retro RPG-like aesthetic and has a lot of content to explore.
At the start of each round, each player is assigned a role onboard the station. There are many jobs, such as the scientist performing research and development of new technologies, the medical doctor trying to keep people alive, or the simple janitor. There are many different ways to play, but most of the interactions on this station will be lewd and 18+. Every round on Space Station 13 is different.
Before Playing
Join our discord! The Discord server can be found at https://discord.gg/qv5rTHQW2a and you need to be in the discord to play. You can find instructions on how to verify there!
It's important to read the rules before connecting for the first time. Some common new player mistakes to avoid include:
- Being violent towards other crew members without any reason.
- Asking questions in OOC (out-of-character) chat that are directly related to anything happening in the round. For example, "Why did I just get killed by the clown?". It's okay to discuss this in deadchat or after the round is over. These questions are also alright if asked in adminhelps (press F1).
The Admins generally try to give players benefit of the doubt, so it's okay to mess up. As long as you're polite and willing to learn from your mistakes, you won't be in trouble. You can press F1/the adminhelp button at any time to send a message directly to the admins if you have any questions.
One last point: please, remember the Out of Character human. Everyone is here to play a game they enjoy, so keep that in mind before you bash someone's brain in with a toolbox because they took your multitool.
Entering the world of SPLURT
First things first. If you want to play on SS13, you require the program to play on SS13. BYOND is a free software suite for creating and playing online games. It is also the engine and platform used to run SS13. You can make your way through the gates of BYOND in order to play following these simple steps:
1. Creating your BYOND account
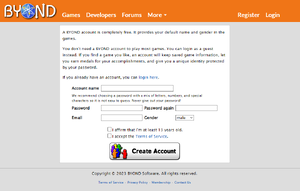
To play in BYOND, you must first have an account with which you'll use to register in-game. In case you don't have one yet, you can create one easily by clicking the "Register" button at the top of BYOND's main page. You'll need to fill some fields as you'd expect from registering a new account. The username you register with when creating your account will be often referred to as your ckey, which is used for several moderation aspects of the game.
2. Download BYOND
The next step after creating your account would be downloading the client to play SS13 in. Make your way to the BYOND download page and download the client. Once you've downloaded it and it is running, it will either show its main page upon opening or it will appear in your system's tray, in which case you should click on its icon to open the client.
Inside the client, you'll see a button to log in to the account you just created. You should click on it and enter your username and password to login.
3. Join the Station
Once you've logged in to your account in the BYOND client, the next step would be joining SPLURT station and getting your account verified. There's a couple ways to do this like finding the station in the Space Station 13 hub list for example. However, the most straightforward way to join is doing so directly through the game's address by clicking in the ![]() button. When doing so, a panel will open and you should enter the address of our station (byond://splurtstation.sytes.net:42069/) in the first field, you may then click on
button. When doing so, a panel will open and you should enter the address of our station (byond://splurtstation.sytes.net:42069/) in the first field, you may then click on ![]() to join SPLURT.
to join SPLURT.
4. Link your Discord account
Once you join our station, you'll see on the right side of your screen a chat window with messages coming from the game, and above said window you'll see another one with a text box and several tabs you can click in. How tabs work and what they're used for is explained later in this same page, but for now you just have to know how to find the button to link your ckey and Discord account together.
To do this, click on the tab labeled as ![]() and then navigate to the
and then navigate to the ![]() button. When clicking on it It should pop up a window with your verification code and a brief description of how to use said code. You should then go to our discord and find the channel used for ckey linking, in which you'll send a verify command with said code as explained in the verification channel of our discord to link your account automatically. Once you see the rest of our channels your account will be linked and you'll be ready to explore the game!
button. When clicking on it It should pop up a window with your verification code and a brief description of how to use said code. You should then go to our discord and find the channel used for ckey linking, in which you'll send a verify command with said code as explained in the verification channel of our discord to link your account automatically. Once you see the rest of our channels your account will be linked and you'll be ready to explore the game!
Setting Up
- Main SPLURT Server (US): byond://splurtstation.sytes.net:42069
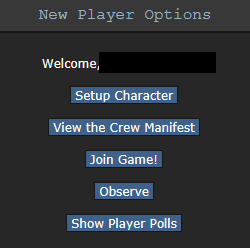
If this is your first time playing on SPLURT Station, you'll need to create a character. Just like you would in any other game. We have a very vast range of customization options available to create almost any character you can imagine

To set up your character, you have to click in the Setup Character button in the New Player Options menu, which will appear in your screen as long as you remain in the splascreen (aka the main menu)
This will open a window which has several different tabs an options available to help you create your own characters which you'll later use in the game. The three main tabs of this interface are Character Settings, Preferences and Keybinds
Character Settings
The Character Settings tab is where you'll set up your characters to use in the game. Every player has by default around 30 slots to use for new characters, which can be selected right below the tab selection menu. To edit one of these slots, just click on it and it will load the information currently saved to said slot. This is also how you select which character you'll spawn as when you join the game. (it'll be your last loaded character slot)
This tab also contains a series of sub-tabs that handle different aspects of your character:

- Name, Gender and Age: These are pretty self-explanatory as much as they're important. Make sure to set them up properly.
- Special names and Custom Job preferences: You don't need to worry about these unless you're planning to join as any of the jobs listed under this section, which isn't recommended for a new player.
- Quirks: minor traits you can give your character. There's negative, positive and neutral quirks you can choose from.
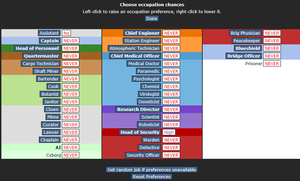
- Jobs Selection: This shows a menu to configure which jobs you could spawn in at roundstart if you choose to join automatically with the Ready button. When the game begins, the server checks each players occupation preferences, and assigns jobs accordingly. You can pick High, Medium, Low, or Never. Each player is limited to one High preference job. Some roles have limited player counts - for example, there is only one Captain. There is a limit of two janitors, but there is no limit on assistants. Also not something you should worry about if you're new.
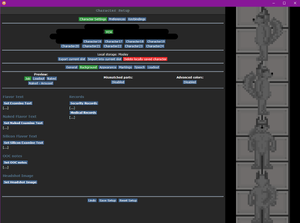
This tab allows you to fill different types of information about your character.
- Flavor Text, Naked and Silicon: These are information (mostly physical descriptions) of your character's appearance. They're supposed to be what other people see when they ICly (in character) interact with your character. The most important is the Regular Flavor text, Naked is an extra text that shows when your character is naked and Silicon appears when you play as a borg, which is more complicated for new players, so don't worry about it yet.
- OOC notes: This is where you talk about your Out Of Character Preferences when it comes to roleplaying (e.g. Kinks, gender preferences, things you're ok with and not ok with doing) and just generally things you'd like other players to know OOCly.
- Headshot Image: You can add a link of an image of your character if you'd like, as long as it follows the conventions and process explained when you click on this button.
- Security and Medical records: These records will be available to certain departments in-game and may or may not affect how characters from said departments interact with yours. By all means this section is completely optional and not recommended for new players to fill.
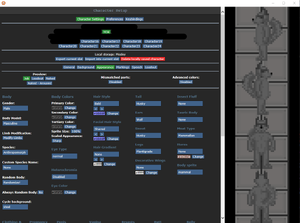
This tab handles the general appearance of your character's sprite, which you can see rendered in the right side of the window.
- Consent Preferences: These are toggles that will be seen by other players about things you'd be ok with and not. They also toggle on and off certain mechanics in the game depending on how you've configured. ERP is for if you're ok with doing erotic roleplay, Non-con for things like rape and kidnapping, and vore is self explanatory. Each of these can be set to yes, ask and no.
- Body options: This section has several options to configure your character's base body. Gender and body model are self explanatory. Limb modifications lets you select prosthetic limbs and similar. Species selects which species your character belongs to. Depending on which species you use your character might or might not be able to use some of the other character sprite options. If you desire your character to be displayed as a different species than the listed ones, you may set up the Custom species name. Mechanically you'll still be of the species you chose, but your species will be displayed as your custom species name.
- Body Colors: These are the colors your character sprite will use. There's the Primary, secondary and tertiary colors, sprites may use one of these colors or a combination of them.
- Clothing and equipment: You may select from a range of backpacks you can spawn with in this option, the jumpsuit option configures what clothes you'll spawn in in case you've not properly set up your loadout or your job clothes don't handle the slot of your main suit (the concepts of loadout and jobs in this context will be explained later).
- Lewd, pregnancy and Genital preferences: As their name suggest, these handle some lewd aspects of your character as well as how it'll interact with the pregnancy preferences, while Genitals are extra organs that you can toggle in your character to add their sprites on them and also use to do lewd interactions with in-game.
- Other sprite options: There's a lot more options to configure your character's appearance, hairs, tails, ears, eyes, etc. Some of these options may or may not be available depending on which species you choose for your character.
There's three buttons above the window that are relevant for this tab. We'll explain them briefly but you shouldn't worry about them too much if you're just starting:
![]() Changes the appearance of your character to match how they'd look in their job clothes, their loadout clothes and naked.
Changes the appearance of your character to match how they'd look in their job clothes, their loadout clothes and naked.
![]() Lets you use character sprites that aren't available for your selected species.
Lets you use character sprites that aren't available for your selected species.
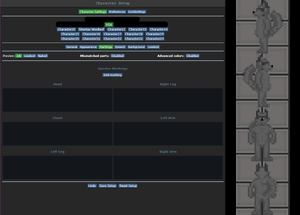
This tab allows you to customize your character even further, working as an addon of the previous tab.
You may select different markings for your character's body parts, which will change the way they look and allow you to use different colors while doing so. You may use several markings for one body part and edit how they're layered to create different effects as you see fit.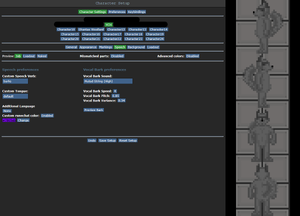
This tab is where you configure options related to your character's speech in game.
- Speech preferences: These will let you configure some options regarding specific mechanics related to your character's speech in game. Leaving them as their default option will use the values given by your selected species for these configs.
- Custom Speech verb: When you use the verb say, your character's statement will start with this verb and then the text you want it to say. For example: Test says, "Hello"
- Custom tongue: The tongue you choose may add certain effects to how your character talks in-game, think of it as different accents your character can have. Don't worry about this if you're too new to the game.
- Additional language: By default, all characters speak Galactic Common, which allows them to speak it and understand other character's speech in this language. Additional languages allow your character to do the same in those languages too. Also don't worry too much about this option if you're new to the game.
- Custom runechat color: When speaking, your character will display the text it said above its head, this option lets you configure the color of this text.
- Vocal bark preferences: When your character uses the say verb, it will make noises similar to how characters do in other games like Don't Starve Together or Undertale. These sounds are known as barks, and these options allow you to configure your character's bark. You may preview your bark to make sure it sounds how you'd like it to.
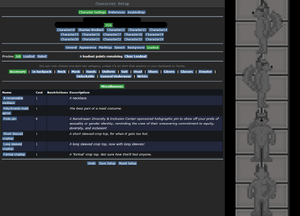
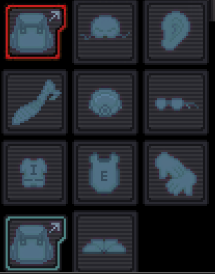
This tab handles your character's loadout The loadout refers to the gear and clothes your character is wearing or carrying in their backpack/hands. There's several different tabs in this section in which you can select items your character will wear in their respective loadout slots when spawning. You may select whatever loadout item or items you desire for each slot and edit said item's name and coloring if you desire. However, bear in mind you have a limited amount of points you can spend in your loadout and that each item costs a certain amount of points. It's also worth noting that each slot except for your backpack and hands can only allow one loadout item.
Knowing that jobs are the different professions or roles you can join the game as, some jobs will also enforce certain loadout items for your character to spawn with, in which case the items you selected will be sent to your backpack in case they conflict with the job items. There's also certain loadout items only available for specific jobs in the game.
Preferences
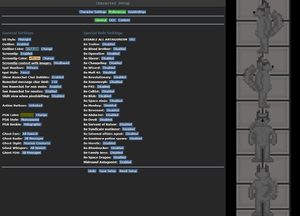
The preferences tab is the section where you can configure your general game settings. It's akin to the configs page in other games. This tab is organized in three different sections of preferences. You may play with these settings however you see fit to customize your game experience; however, if you're completely new to the game it's recommended that you don't change their values for most configs (except for the content preferences), but rather leave them as they come by default. We'll proceed to explain the sections of this tab, and should there be any settings that you should personalize before your first game, it'll be mentioned too.
General
The general preferences contain settings related to the appearance of different elements in-game, including the appearance of different types of information or texts in the game window as you play as well as the appearance of different interfaces you'll interact with. It also contains options related to your chance to become an antagonist automatically during the game. Although this mechanic is disabled in the game and the appearance of antags in the station is incredibly rare, it's recommended that you make sure your DISABLE ALL ANTAGONISM option is "Yes" if you're new to the game.
OOC
The OOC tab contains settings related to the appearance and behavior of different windows and interfaces of the game. It also handles some setting regarding OOC preferences about how you interact with different aspects of the game, like hearing music played by admins for example. The only option from this tab that you should probably look into as a new player is the FPS preference. This will allow you to change the framerate at which the game is displayed on your end. You might wanna set it to a higher value than default (e.g. 60 FPS).
Content
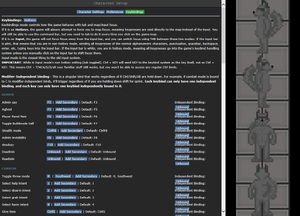
This tab containts options for what kinds of content and mechanics you'd be ok with interacting as you play, mostly related to different kinds of kinks and lewd content. Our station is focused on ERP and nsfw content, and to facilitate this a lot of different mechanics have been added to the game, which vary from oriented towards general lewd interactions to more kink focused content. Unlike the previous two sections, you will want to configure these preferences depending on what type of lewd interactions you'd like to experience in the game, from a mechanical standpoint of things. Just like you would place your kinks and limits in the OOC notes of your character, it is recommended that you toggle these settings depending on what type of content you'd like to interact in the game.
Keybinds
The keybinds are the different interactions that will be performed while in-game when pressing in your keyboard's different keys. Just like they would in any other game, these keybinds can be easily configured to provide you with a more comfortable and easy way to interact with the game depending on your playing style. If you're a new player, it's also recommended that you leave them as they come by default until you're more familiar with the game.
Joining the Game
Now that you've created your character, you're ready to join the game. (You may want to continue to read the guide before jumping in.)
There's two possible menus here - the lobby screen will either display a list that has Join Game! or a Ready/Not Ready toggle.
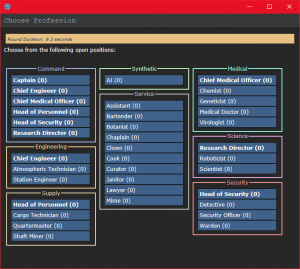
If the window says Join Game!, there's currently a round going on. This is most likely what you'll see.Click on the button, and a window will pop up asking you to choose a profession. The jobs available will vary, but Assistant is always available*. The numbers in the brackets next to the job title show the current number of players who have been assigned that job for the round, if there is a zero inside the brackets, no one has been assigned to that job for the round. When you click on the job you want, you'll be brought to the station via the arrival shuttle. You'll start out on a transit shuttle that will dock at the station in a few seconds. You'll also be strapped into a chair, so don't forget to unbuckle yourself (click your seat, the Buckled HUD icon or press the resist hotkey if enabled).
If the window has three buttons that say Ready, Not Ready, and Observe, that means a round has not started yet.This is ideal, because you'll be playing the round from the beginning, when things are the going to be calm and allow you to get your bearings in a relatively safe environment. Toggle the button to Ready, then wait for the game to begin. (You can see the time until the game begins on the Lobby tab, on the top right of the game window.)Pressing Observe will spawn you as a ghost, which is essentially a spectator - you won't be able to spawn normally until the next round if you select this option!
*Sometimes, at the start of a round, a different service job is chosen to be the infinite slots job at random. If Assistant is not available, just click the one with the highest numbers. Don't worry, people generally won't pester you with any responsibities once they realize that the bartender is actually just one of 27.
Interface 101
Tabs
Before you do anything else, take a look at the top right of the game window. You'll see some tabs labelled Status, Lobby, Admin, IC, OOC, Object, and Preferences. The Admin tab contains the Adminhelp button, used to contact admins directly if you have a question or believe someone is breaking the rules.
While the Status tab does not have any buttons for you to push, it is a very important element! The Status page displays the time that the round has been going for, the Round ID, which is useful if something happened during the round that you want to bring up with an admin, the pressure in your airtank, the current map,
It is quite self-explanatory! Should you find someone breaking the rules of the server, or find yourself with an issue that requires the intervention of a moderator, you are free to make an Adminhelp, or Ahelp for short, to have it sorted out!
This will be the most important tab to you, the SPLURTer! In here, you can a bunch of verbs, some of the more important ones beings:
- Say: This verb will open up a window, in which you can talk as your character. Also includes a say_indicator option, for when you want to guarantee that the world sees your character about to speak!
- Me: The Me verb, when used, will open up a large window, in which you can describe what your character is doing. An example of this would be "Sits down and looks up." When written, it will then be put into the chat window as "CHARACTER sits down and looks up." Much like the Say, includes a me_indicator option, for a guaranteed indicator.
- Whisper: This verb is another version of talking, in which your character's speech will only be visible to the people standing next to your character.
- Subtle: Subtle is an alternate version of Me, in which your character's emote (what they're doing) is only visible to those next to your character. The Subtle verb also includes Anti-Ghost, in which observers can't see your emote, Around Table, where those on the opposite side of a table would see your emote, and Chat Indicator, to show others that you are currently writing, but the text itself will only be shown to those next to you.
- Pray: Pray is a feature which allows you to plea to the Gods, IE, the Admins, in an in-character fashion. This is primarily used for requesting an item
- Examine: Examine allows for you to 'look at' the people within your vision. This lets you see all of the things that they are currently wearing, check if they have any damage that you can see, IE "They have moderate bruises", and access the character description, and OOC notes. Check Out, a similar command, does the same thing, but informs the person you are inspecting.
The Mentorhelp and Mentorwho, are buttons that allow you to ask a question to a Mentor, and see which mentor is around. Now, Mentors are veteran, experienced station-goers that know almost, if not truly every aspect of the server, and how it operates. Should you have a question about how the game works, they are your first line towards an answer!
Now, the OOC tab is one that you will find yourself flicking to regularly, but not as much as the IC tab! The most important commands of the OOC tab, would be:
- OOC: OOC allows you to talk in the OOC (Out-Of-Character) chat! Keep in mind, these messages are visible to EVERYONE on the server!
- LOOC: This verb is similar to OOC, but, instead is an OOC message that only those within your line of sight can see. Useful for talking with an RP partner, or asking someone a quick question!
- The Character Directory: The Directory allows for you to see a list of every single character currently on the station, as well as access their descriptions, and OOC notes, from afar! Also used for advertisements for roleplay, and quick summaries of the character.
- Show Station Minimap: Quite self-explanatory! With this verb, you receive a small minimap, which shows the current station. While it does not show you where you are, it is very useful for getting some bearings!
- Fix Keybindings: Should your keybindings, like T for Say, not work, use this button! After a short moment, usually one or two seconds, your keybinds will work!
- Fix Chat: If your chat at the bottom right is entirely blank, and no messages are appearing on it, this button is to be used! Resets the chat, and, if all is well, fix the issue!
- Changelog: the Changelog allows for you to look at the latest updates for the server, and see what's changed!
the Preferences tab, to go deeper into the subject, contains the toggles for various features and noises that some players might find disruptive. The ones that you may find yourself toggling a bunch of times, dependent on the server, would be:
- Game Preferences: the Game Preferences tab is a quick shortcut to access content preferences and OOC preferences, like the color of your text, or whether or not you even wish to hear the sounds of lewd activites around you.
- Hear/Silence Instruments: If jukeboxes and player instruments annoy you, this verb will mute them entirely.
- Hear/Silence Midis: Admins playing Dagothwave five times in a row? The Midis verb will disable any admin-played music.
- Hear/Silence Vocal Barks: Vocal Barks are noises that all characters make while talking. Be it chittering or low banjo, if you don't want to hear them, this is the button for you.
- Toggle Eating Noises: Quite Self-explanatory. Mutes all eating sounds, for those with misophonia.
- Show/Hide OOC: Also self-explanatory! Hides the OOC chat entirely, to let you focus on that roleplay!
- Hear/Silence Lobby Music: Should the randomly-played lobby music annoy you, this button will mute them.
In the Status tab, take note of the map currently being played on the server. It'll be used later in the guide.
HUD
The biggest barrier to entry in Space Station 13 is the controls. The UI is, at a glance, complex, and the controls are unintuitive. Thankfully, once it clicks, you'll never have an issue with it again. Don't let it overwhelm you - after a round or two of practice, you should be fine.
The top right of the screen contains the action tabs mentioned previously, and the bottom right is the text log. This is where you can see what people are saying, what's happening around you, and chat such as OOC or adminhelps. The bar along the bottom of the screen is the input bar, but since we're on Hotkey mode we won't need to use it. There's quite a few HUD elements on the main screen, so let's break them down into sections. Don't worry if you can't memorize what everything does at once - you can always come back to this guide.
The backpack ![]() icon can be toggled to show your worn equipment.
icon can be toggled to show your worn equipment.
The belt ![]() , backpack
, backpack ![]() , and pocket
, and pocket ![]() icons are all storage locations.
icons are all storage locations.
The drop ![]() and throw
and throw ![]() icons do what the name implies. Dropping is self explanatory, but the throw button is a toggle - if it's on and you click somewhere, you'll throw the item in your hand at where you clicked. (You can also press R to enable throwing and Q to drop your held item.)
icons do what the name implies. Dropping is self explanatory, but the throw button is a toggle - if it's on and you click somewhere, you'll throw the item in your hand at where you clicked. (You can also press R to enable throwing and Q to drop your held item.)
The pull ![]() icon only appears when dragging something, and can be pressed to stop dragging an object. Hotkey: "del".
icon only appears when dragging something, and can be pressed to stop dragging an object. Hotkey: "del".
The rest ![]() icon lets you lie down on the floor, and crawl into crates or under flaps. If you actually want to rest, click the Sleep verb in the IC tab. Hotkey: "U".
icon lets you lie down on the floor, and crawl into crates or under flaps. If you actually want to rest, click the Sleep verb in the IC tab. Hotkey: "U".
The internals ![]() icon can be clicked to enable/disable your internals (oxygen tank and breath mask).
icon can be clicked to enable/disable your internals (oxygen tank and breath mask).
The resist ![]() icon can be pressed to break out of grabs, restraints, and if you're on fire, is the "stop drop and roll" button. Hotkey: "B".
icon can be pressed to break out of grabs, restraints, and if you're on fire, is the "stop drop and roll" button. Hotkey: "B".
The run/walk toggle ![]() icon can be pressed to switch between running and walking. Running is faster, but walking has benefits, such as being able to walk over water without slipping - useful for when the janitor doesn't put wet floor signs down. Hotkey: Hold "alt" to walk.
icon can be pressed to switch between running and walking. Running is faster, but walking has benefits, such as being able to walk over water without slipping - useful for when the janitor doesn't put wet floor signs down. Hotkey: Hold "alt" to walk.
The body selector ![]() icon is used to choose which body part you want to target. This is used for both targeting specific sections to heal, or targeting specific sections when attacking someone. Click a limb to target it. (You can target individual arms, legs, the head, the upper torso, the groin, the eyes, or the mouth.) Hotkeys: "numpad keys".
icon is used to choose which body part you want to target. This is used for both targeting specific sections to heal, or targeting specific sections when attacking someone. Click a limb to target it. (You can target individual arms, legs, the head, the upper torso, the groin, the eyes, or the mouth.) Hotkeys: "numpad keys".
The crafting menu ![]() icon opens the crafting menu.
icon opens the crafting menu.
The speech bubble ![]() icon opens the languages menu. You won't need to use this for the tutorial.
icon opens the languages menu. You won't need to use this for the tutorial.
The create area ![]() icon is used to create an "area", which is a more advanced topic. You won't need to worry about it for this tutorial.
icon is used to create an "area", which is a more advanced topic. You won't need to worry about it for this tutorial.
![]() Oxygen warning - The air you're breathing doesn't have enough of oxygen (or other substances) (black), or too much (red). You'll usually see a black oxygen warning from being exposed to space. Put on a gas mask and have an oxygen tank! You can put a small emergency oxygen tank in your pockets or belt if you don't want to be holding it, and if you can find a hazard vest or suit you can put it in the leftmost storage slot. You can find small oxygen tanks and masks in the survival box in your backpack and in blue oxygen emergency lockers. They don't last very long, though.
Oxygen warning - The air you're breathing doesn't have enough of oxygen (or other substances) (black), or too much (red). You'll usually see a black oxygen warning from being exposed to space. Put on a gas mask and have an oxygen tank! You can put a small emergency oxygen tank in your pockets or belt if you don't want to be holding it, and if you can find a hazard vest or suit you can put it in the leftmost storage slot. You can find small oxygen tanks and masks in the survival box in your backpack and in blue oxygen emergency lockers. They don't last very long, though.
![]() Pressure warning - Pressure levels are too high (red), or too low (black). Low and high pressures can kill you. You'll usually see a black pressure warning from being exposed to space. Put on a space suit! There's hardsuits in the red fireman lockers.
Pressure warning - Pressure levels are too high (red), or too low (black). Low and high pressures can kill you. You'll usually see a black pressure warning from being exposed to space. Put on a space suit! There's hardsuits in the red fireman lockers.
![]() Toxin warning - You are breathing in toxic gases.
Toxin warning - You are breathing in toxic gases.
![]() Fire warning - The air is hot enough to burn you.
Fire warning - The air is hot enough to burn you.
![]() Freeze warning - The air is cold enough to freeze you.
Freeze warning - The air is cold enough to freeze you.
![]() Temperature warning - You're too cold or too hot.
Temperature warning - You're too cold or too hot.
![]() Hunger warning - You're either fat, hungry, or starving. Being fat slows you down considerably, so consider eating less.
Hunger warning - You're either fat, hungry, or starving. Being fat slows you down considerably, so consider eating less.
Controls

The controls might seem a tad excessive, but don't worry - you'll only be actively using a few of the many there are. There's a lot of edge cases in SS13, due to the sheer nature of features and content available. You can check this page for a list of every keybinding. Although your control scheme was changed to Hotkeys in the Game Preferences menu, it may not have applied itself - if there is a large red bar going across the bottom of the screen, click somewhere on the game window and press Tab. This is the manual toggle for hotkey mode - if the bar changes to white, you're good to go.
- Use WASD to move.
- Press T to talk.
- If you add a semicolon before anything else, you'll transmit your message to the general chat radio.
- You can speak on department specific radio channels - the format is the same for each, just with a different letter. To speak on the medical channel, for example, type .m before your message. (You can also use :m or #m)
- Press O for OOC chat.
- Be careful not to mix the two chat buttons up - your cry for help might end up going in OOC, where anyone can see it at any time.
- Press M to write an emote.
- This is for nonverbal actions - for example, writing "sighs." in the text box would show as "[Character Name] sighs."
 Ordinary left-click. It doesn't matter if Combat Mode
  Enable with 4, disable with 1 or toggle with F by default. Left-clicking people with an empty hand will Harm
  them if on, or Help
  them if off. Prevents you from switching places or being pushed when colliding with people. is on or not. on objects in the game world to interact with them. For most, you'll need to be next to or on top of the object.
- This is used for things such as interacting with computer terminals, picking up items, using an item on something, or attacking someone.
- 'Shift+
 Ordinary right-click. It doesn't matter if Combat Mode
  Enable with 4, disable with 1 or toggle with F by default. Left-clicking people with an empty hand will Harm
  them if on, or Help
  them if off. Prevents you from switching places or being pushed when colliding with people. is on or not. something to open the context menu, which can be used for a variety of things.
- Context menu is slow and clunky, and you can usually perform most actions with hotkeys instead. There are a few examples of actions that can only be done with the context menu, but they're far and few between.
 Hold CTRL and left-click a person with your hand empty. It doesn't matter if Combat ModeLeft-click on something while holding Control to drag it.
 Enable with 4, disable with 1 or toggle with F by default. Left-clicking people with an empty hand will Harm
  them if on, or Help
  them if off. Prevents you from switching places or being pushed when colliding with people. is on or off. Repeat after a short delay to upgrade grab to aggressive (lvl 2), neck (lvl 3) and strangling (lvl 4).
- Hold Shift and
 Ordinary left-click. It doesn't matter if Combat Mode
  Enable with 4, disable with 1 or toggle with F by default. Left-clicking people with an empty hand will Harm
  them if on, or Help
  them if off. Prevents you from switching places or being pushed when colliding with people. is on or not. on something to examine it.
 - Press X or Middle Mouse Button to change your selected hand.
- Your selected hand is the one that will pick up an object (if empty) or use the object in that hand (if holding something). You can tell which is selected by the small box around one of your hands.
- Clickdragging is used for a couple of specific actions.
- For example, to climb onto a table, drag and drop your character to the table.
- To put things on/take things off of someone, drag and drop their character onto yourself. (To put things on them, you'll need to have the item in your selected hand.)
- You can open a container without holding it in your hand by alt-clicking it or clickdragging it onto yourself. This also works for storage items you're wearing, which is useful if your hands are full.
- You can also buckle yourself/other people to chairs using this. It can be tricky, as you have to be on top of the chair, and your mouse has to be on top of the chair's exposed sprite.
Gameplay Concepts
Before getting into anything else, it's important to note that since SS13 is such an open ended game that has other people in it. If things happen to go wrong, there are multiple ways you can be brought back into the game - don't get frustrated if something happens.
There's a few specific concepts that are often stumbling blocks for newer players, so let's address those first. (These are all in expandable boxes to save space, but it's not a bad idea to read them beforehand.)
The Hands System
One of the things the majority of new players have trouble with is the hands system. It's not complex once you've figured it out, but it can be difficult to understand without help.
You have two hands at your disposal. The bright box around one of your hands is the selected hand. This is the hand that's used whenever you click on something - if it's empty, you'll either pick up an item, or interact with something (like a computer terminal or vending machine).
If you have something in your selected hand, you'll use that item on whatever you click on. This can lead to confusion, because if you have something in your hand, you can't use things such as terminals or vending machines - you'll either hit the object with your item or do nothing.
This is because you're trying to directly use the item on the object - this is why you're able to use a screwdriver to open the panel on a door, use wirecutters on a grille, or similar actions.
This can also cause problems with backpacks, boxes, and other containers - if you want to open a container, alt click it. You can also pick it up, then switch hands and click on the container with an empty hand. Clicking on a container with an object will put it in the container. This also means that if you'd like to take your backpack off, you need to click and drag the bag to an empty hand - a normal click just opens the equipped bag.
Basic Interactions
These are basic interactions you can perform when clicking people with an empty hand. Some require Combat Mode ![]() Enable with 4, disable with 1 or toggle with F by default. Left-clicking people with an empty hand will Harm
Enable with 4, disable with 1 or toggle with F by default. Left-clicking people with an empty hand will Harm ![]() them if on, or Help
them if on, or Help ![]() them if off. Prevents you from switching places or being pushed when colliding with people. to be on or off (press 4 to enable, 1 to disable or F to toggle). Combat mode should be kept off by default or you will block people. Read more here.
them if off. Prevents you from switching places or being pushed when colliding with people. to be on or off (press 4 to enable, 1 to disable or F to toggle). Combat mode should be kept off by default or you will block people. Read more here.
 Help
Help 
Combat mode must be off. Is used for friendly interactions, such as giving hugs or performing CPR. Be careful - if you have an item in your hand that isn't designed to help someone, you'll still attack them with it!
 Disarm
Is used to non-lethally push people away or against walls. Read more here.
 Grab
Grab 
Allows you to grab people and also upgrade grabs. Read more here.
 Harm
Harm 
Combat mode must be on ![]() . This lets you punch people, or kick them if they are prone. Read more here.
. This lets you punch people, or kick them if they are prone. Read more here.
Damage
There are a few different damage types in SS13. Some common ones are brute, burn, toxin, suffocation. If you take enough damage you'll fall unconscious into critical condition, better known as Crit. If left untreated in this state, you'll slowly suffocate until you die. Read more about damage types here. To learn how to best treat them see the Guide to medicine.
Combat
Combat in SS13 is very heavily focused on who falls over first. If you're prone, you've likely lost. This means items like soap ![]() or disablers
or disablers ![]() are extremely useful.
are extremely useful.
If you get into a fight, then, something has gone wrong. The server will not have you battling for your right to survive on the station, and, should you get into a fight, consider your options. It may be best to try and simply run away, and avoid the conflict. If you think you can disarm your opponent and stop the fight before anyone does something they'd regret, you could turn the tables by taking their weapon. Combat in SS13 is fast paced and revolves around a lot of back and forth swipes, almost like a strange joust between 2D spacemen, should you ever get in enough trouble to have to resort to violence.
Getting better at combat in SS13 requires practice - there's only so much you can be taught. The rest is learning how to create and take advantage of opportunities. Thankfully, combat is almost nonexistent, and would mostly be you against some non-crewman creature, so you wouldn't have to worry about any of that!
To learn more about combat and how to win potential fights, see the Guide to Combat.
Ghosts
If you end up dying, don't worry, there's a few ways to go from there.
If you try to move, you'll ghost out of your corpse. This is essentially spectator mode - you can communicate with other dead players (and talking about the round out of character is okay in this chat) by talking normally and are able to fly around the entire map. (Note that while it's okay to talk about the round in deadchat, if you're revived, you cannot use any information gained while dead. Anything you saw while alive is fair game.)
If you die, you can be revived, turned into a podperson, have your brain removed and put into a cyborg, or more. There are ghost roles that can be played by dead players - some areas have objects that, when clicked on as a ghost, will spawn you as a new character. (As you become a new character, don't use any information from your past life.) There may even be alerts that pop up while you're dead, asking if you'd like to take control of certain mobs in the game. These are often provided by admins, but can occasionally happen via random event. Please note that if you take on a ghost role you CANNOT be revived or return to your original body!
We understand that sometimes the game may not play fairly due to connection issues or general lag. Which is why admins take the freedom to grant revives to players that make an ahelp or a prayer, an in-character way of appealing to the admins without the seriousness of an ahelp. While the blanket rule is that the players receive two additional chances at life, they will not always be granted! Approach the staff team with respect, and you'll have a much higher chance of getting your shot!
Playing the Game
 |
C-05-MO, the AI says: "Hello! The automatic diagnostic and announcement system welcomes you to Space Station 13. Remember: Have a secure day." |
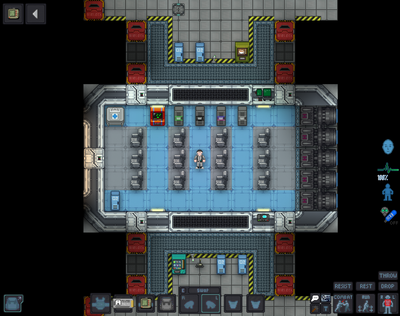
Now that we've gone over the interface and some more important game concepts, let's jump into the game. If you join a game in progress, you'll usually spawn on the arrival shuttle. (You'll start buckled onto a chair as the shuttle docks with the station - press the Resist button on the HUD or the picture of the chair to unbuckle yourself). If you "readied up" while the server is starting, you will be placed in an area respective to your role! Captains will be in their offices, the scientists in the Research Department, etc!
SPLURT station has multiple maps that the server will vote for at the end of every round. The game can take place on a large range of different maps that are voted for at the end of a round. You can visit the individual wiki pages to see the layout of a specific map.
Each station has a unique layout, so feel free to use these maps to guide yourself with.
- "BoxStation" Click here for a map of BoxStation. Visit the wiki page for BoxStation for more details.
- "MetaStation" Click here for a map of MetaStation. Visit the wiki page for MetaStation for more details.
- "DeltaStation" Click here for a map of DeltaStation. Visit the wiki page for DeltaStation for more details.
- "TauStation" Click here for a map of TauStation. Visit the wiki page for TauStation for more details.
If you've chosen Assistant as your role, you'll have no responsibilities. This means you can safely attempt to get your bearings without fear of someone telling you that you need to be doing something. It might be awkward at first, but it doesn't take much time to get to grips with how to control your character.
What to do if There's a Breach
If you hear the telltale sound of air being sucked out of a room or see a hole in the station, something's gone wrong and caused a breach. It's wise to avoid being exposed to the vacuum of space for too long, but if you need to pass by, you can put internals on.
When you spawn, inside your backpack is an emergency kit with a small tank of O2, a breath mask, and an epipen to stabilize someone who's in crit.
- Step 1
- Using an empty hand, click on your backpack, then click + drag the box inside to your character's sprite. This will open the box.
- Step 2
- Take the breath mask and put it on your mask
 slot (press the equipment
  icon to see it).
 - Step 3
- Take the O2 tank and put it in one of your pockets. This leaves your hands free for other tasks.
- Step 4
- Press the internals
 icon to turn on your air supply.
This will keep you breathing clean air - make sure to avoid exposure to a vacuum for too long, and watch your air tank's supply in the Status bar!
|
What to do in your First Round
As explained before, Assistant is the best starting role for players first interacting with the station due to the lack of objectives or responsibilities. This means you're free to explore the station and learn about the game, and most importantly, roleplaying and interacting with other people's characters. Trying to immediately tackle a department that's high-intensity, like Medical or Security, will quickly overwhelm you, and you may lose the fun in wanting to try it. The only way to learn is through trial and error, and people are quite forgiving of mistakes, however, when you join as an assistant you're free to make new friends and let them teach you about how the many aspects of the station work. The best way to learn a department is to ask for help! A lot of the server's occupants will gladly explain the functions of a department, without having you thrown into the brink of it yourself.
What Jobs to Take After Your First Round
 |
Julie, the Captain says: "You're brand new here so consider what sort of stuff you want to do. Wanna help people recover from their workplace injuries and dismemberment? Consider applying for our Medical Doctor program. Wanna unravel the mysteries of the universe, and also make massive, massive explosions? Get your degree in theoretical physics and become a Scientist. Wanna put your back into work and really get down and dirty with the station? We got openings in our Botanist, Chef, and Janitor programs. If you're here at the start of the shift, those'll put you in your workspace, with plenty of tools to get the job done. Nanotrasen usually has checks to make sure fresh meat doesn't get to be the Captain, but if you manage to end up in that position, you'll probably become another case for me to solve." |
- Though many say that Assistant is the best starting role, the lack of a focused objective can make learning the game difficult. If you feel like you've learned enough of the game, you might be better off trying a role that isn't all too critical to the game, but still has a job to do, such as a Service-related role like the Chef, Cargo Technician should you wish to experience the logistics side of Space, Janitor for a simple cleaner's life, or Prisoner.
- After you've gotten used to the controls and general idea of the server, you might want to move to a role such as the stalwart Scientist, plant-growing Botanist or the critical Station Engineer. These jobs have more depth to them than some other roles. Keep in mind, however, that the Engineering department will ask a lot of you, so do read up on your tools before trying it!
- Playing security roles like the Security Officer or Warden before you're proficient with the controls and know enough about the game to treat people fairly is not encouraged. It's very easy to play security poorly, and letting the power get to your head is a bad idea. Security is an intensive job, that will constantly have something be asked of you!
- You'll want to avoid round critical roles such as Captain, AI, or any heads of staff until you're well versed in the game and know what's going on. If, by some coincidence, you end up being one of these roles and you aren't prepared, you are more than welcome to cryo! That will open the slot for another player, and nobody would judge you for doing so!
